# 什么是 WebApiEngine
WebApiEngine 是一个可用于动态 WebApi 生成的引擎,基于 .NET Core(包括 .NET 5、 .NET 6),用于解决前后端分离、微服务、异步 Web 请求场景下的 WebApi 的动态生成和管理,并全面兼容 Swagger。
# 开源地址
WebApiEngine 完全开源,可商用。承载于 Senparc.CO2NET.WebApi 库,同属于 CO2NET 开源项目:
https://github.com/Senparc/Senparc.CO2NET (opens new window)
# 使用方法
以下是 WebApiEngine 的使用方法,将以最原始的默认 .NET Core WebApi 模板项目作为基础进行构建,以便大家学习和亲手实践。
首先,使用 Visual Stduio 或命令行创建原始项目。
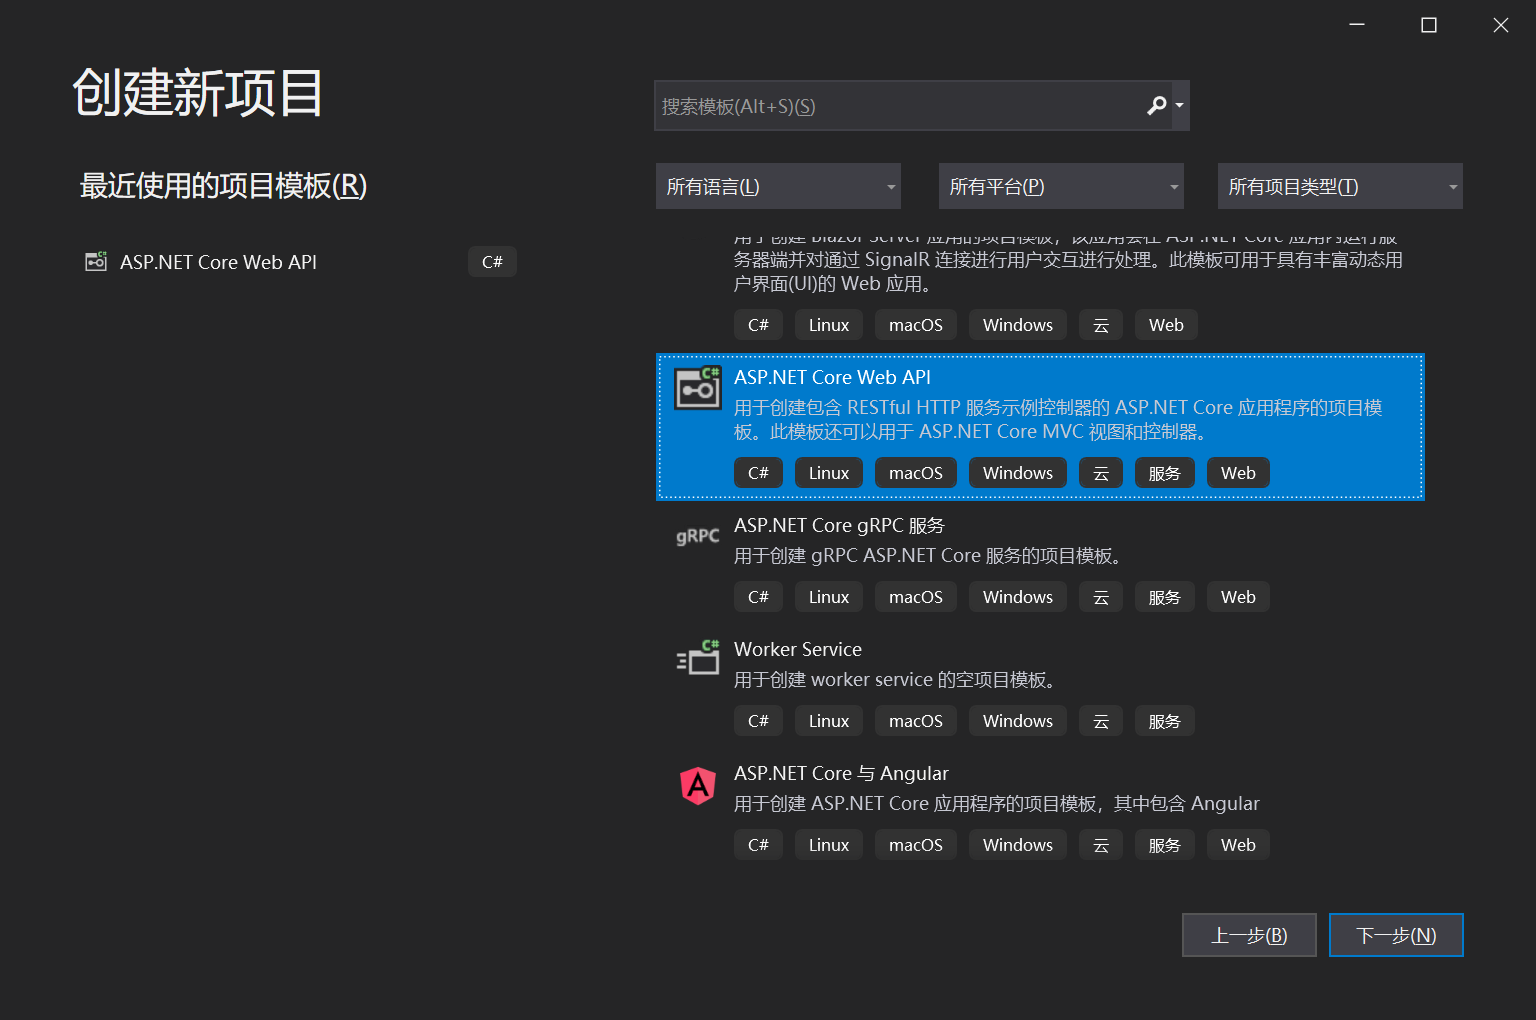
选择 ASP.NET Core Web API 项目
或使用命令行,免去创建项目的其他步骤:
dotnet new webapi

命令行创建项目模板
项目创建完成后,已经默认包含了一个模拟气象数据查询的接口:
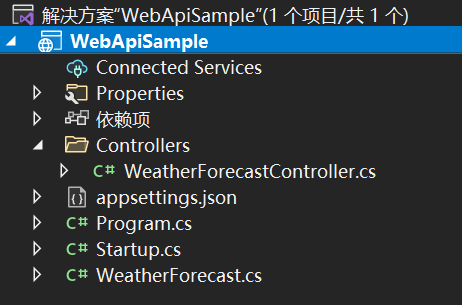
原始项目
小贴士:您可以使用 NET Core 3.1 或 .NET 5、.NET 6 进行开发,代码没有任何差别。
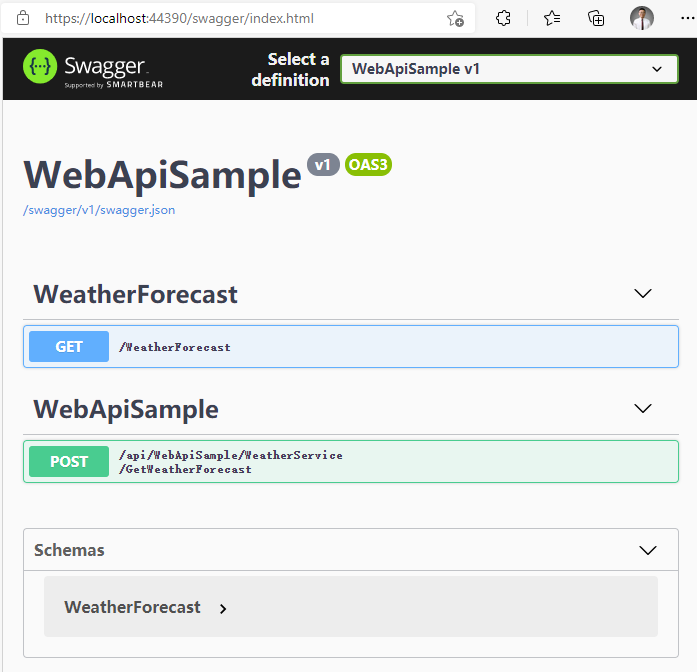
运行后默认已经加载了 Swagger:
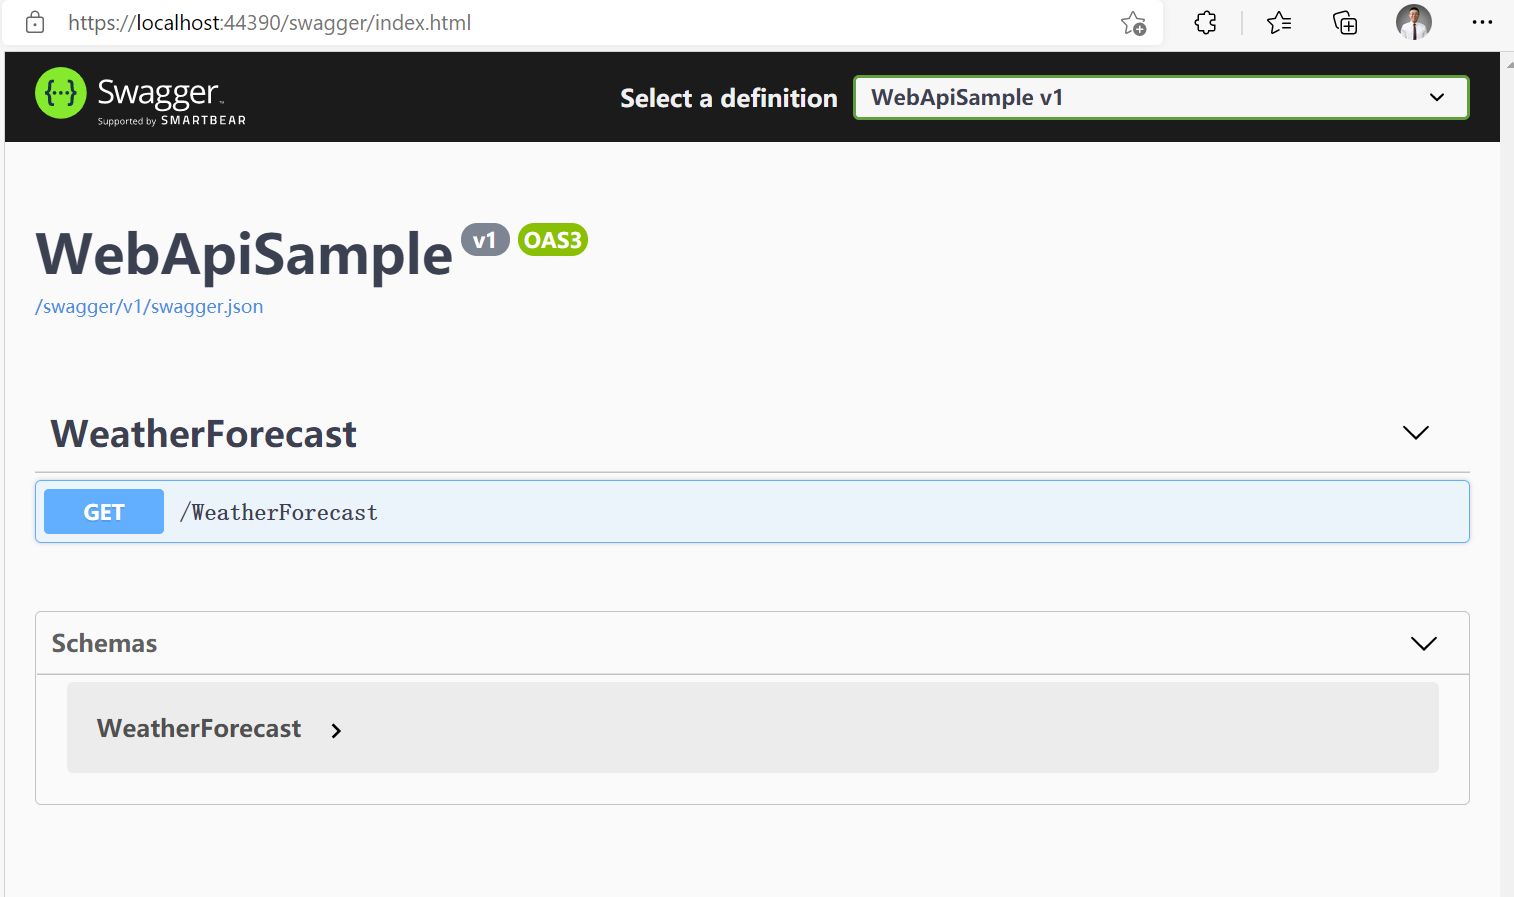
原始运行页面,为 Swagger 首页
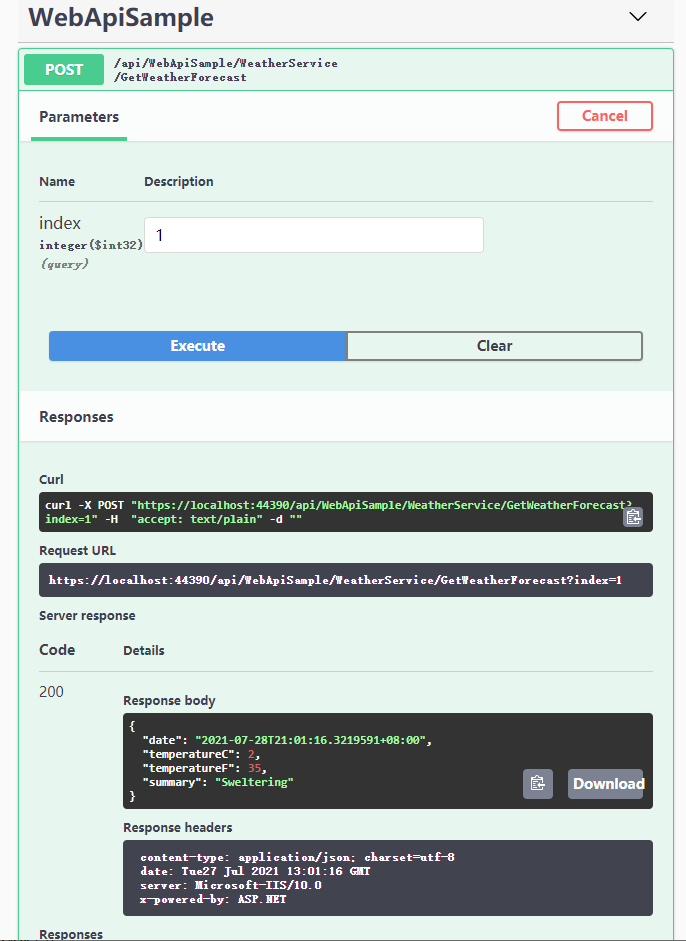
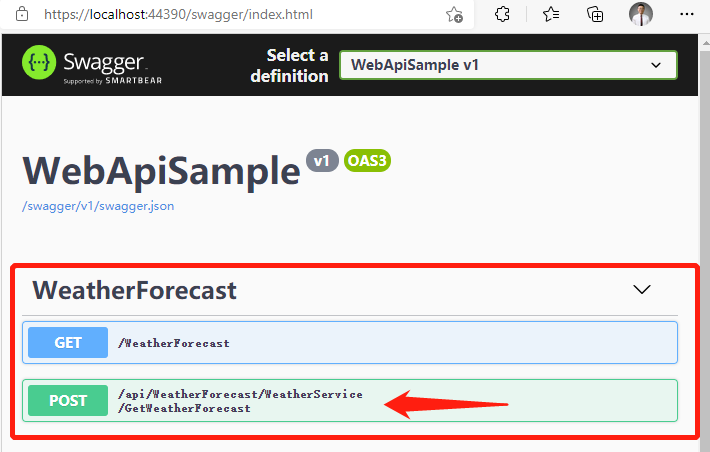
使用 Swagger 我们已经可以测试 API:
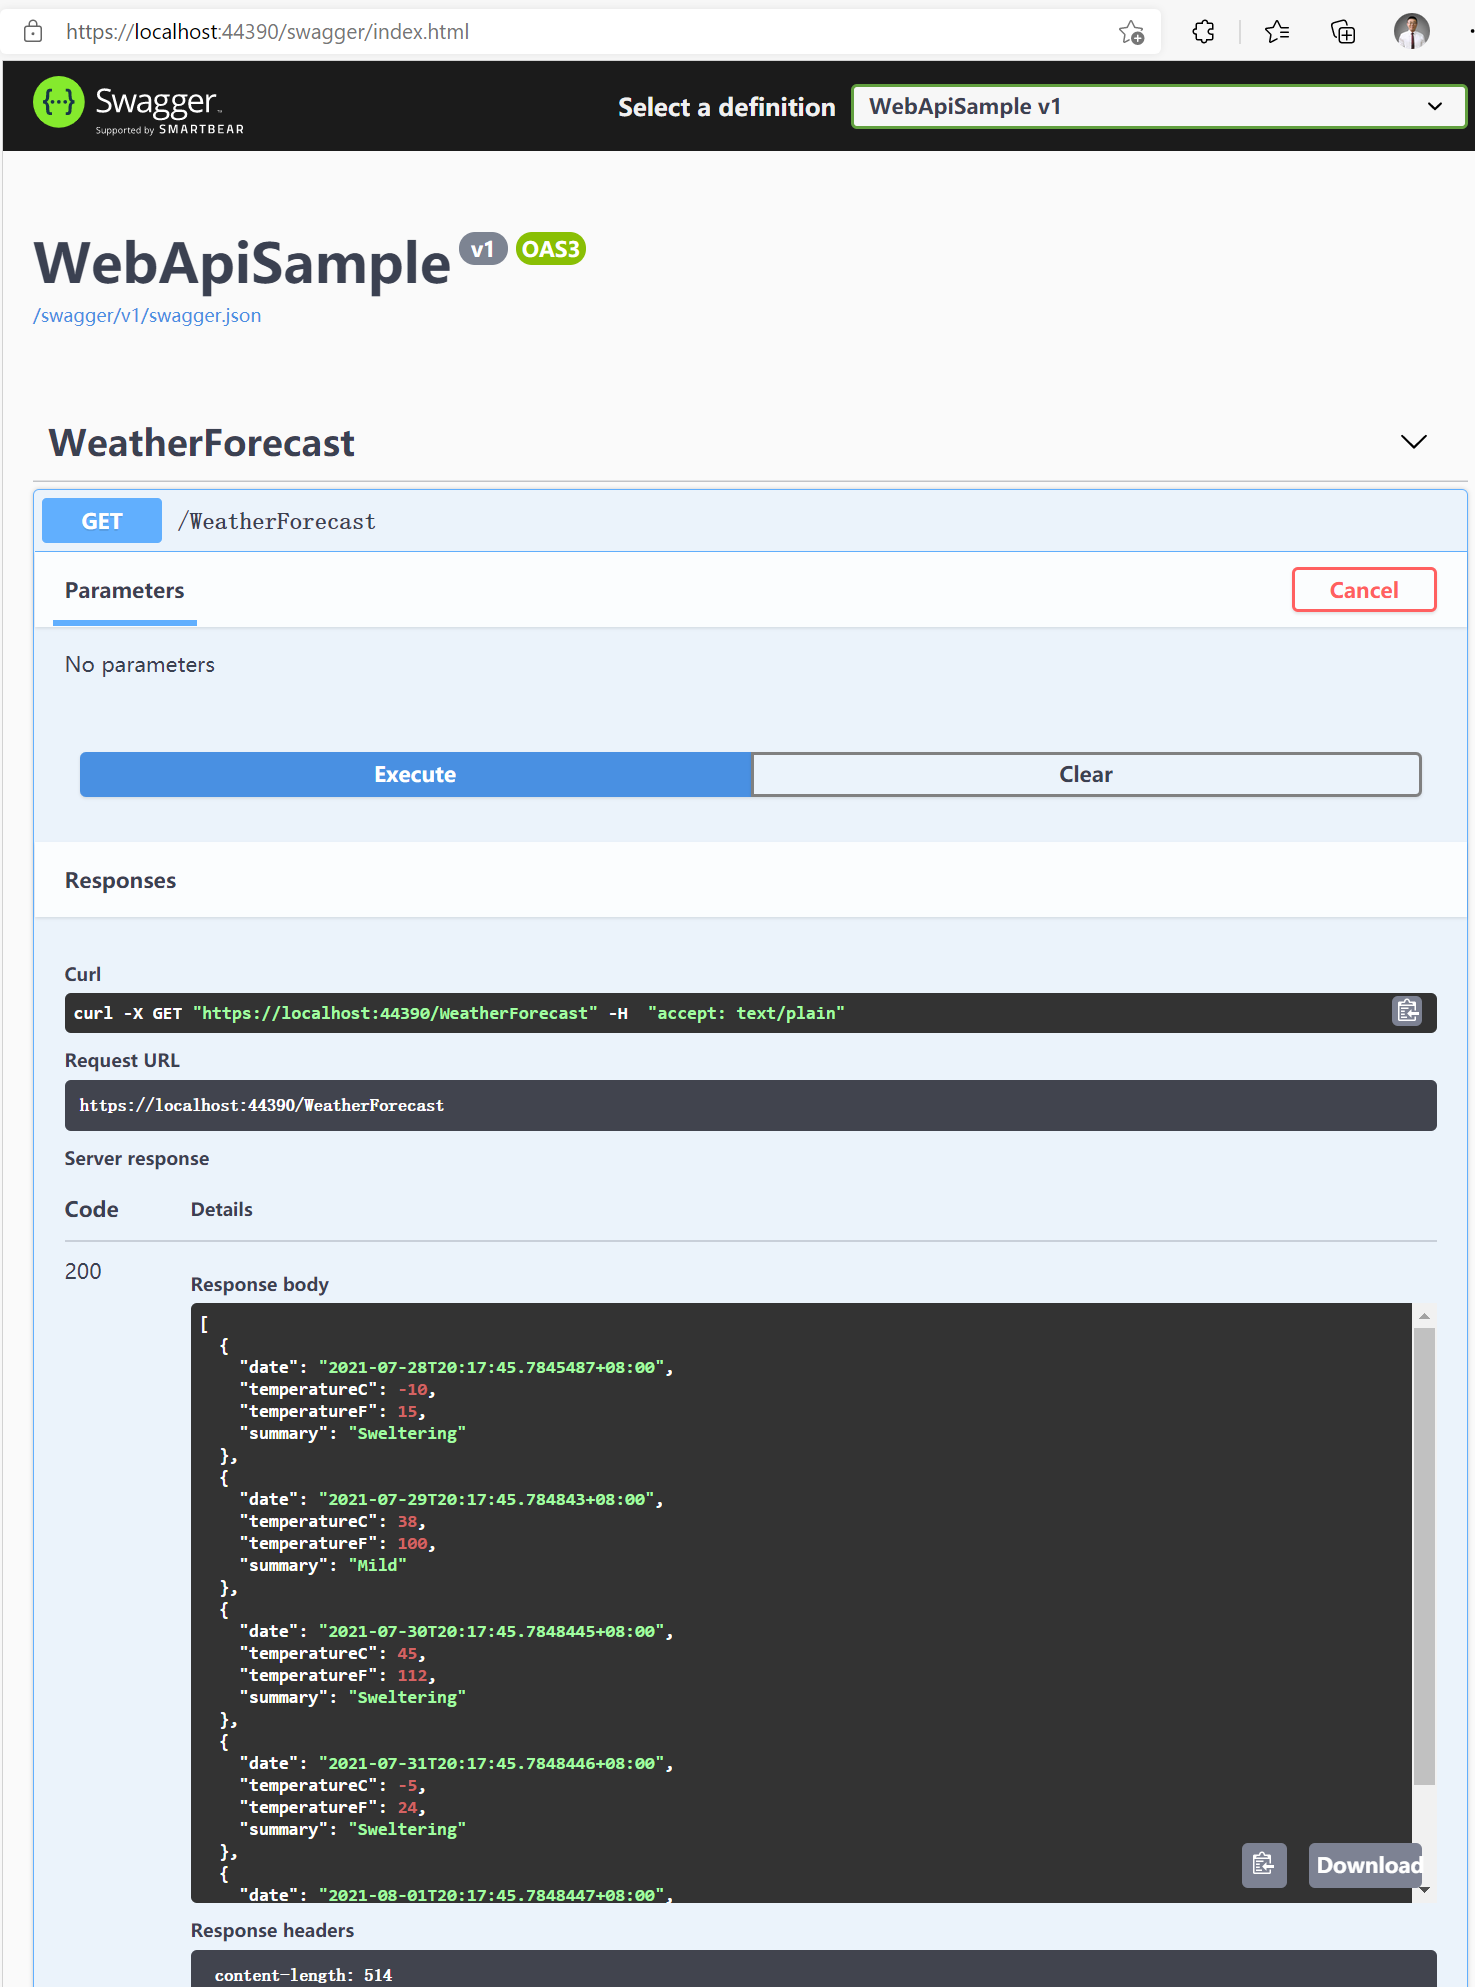
使用 Swagger 测试接口运行
此处的 API 还是需要手写 API 才能完成,打开 WeatherForecastController.cs 可以看到初始化内容:
using Microsoft.AspNetCore.Mvc;
using Microsoft.Extensions.Logging;
using System;
using System.Collections.Generic;
using System.Linq;
using System.Threading.Tasks;

namespace WebApiSample.Controllers
{
    [ApiController]
    [Route("[controller]")]
    public class WeatherForecastController : ControllerBase
    {
        private static readonly string[] Summaries = new[]
        {
            "Freezing", "Bracing", "Chilly", "Cool", "Mild", "Warm", "Balmy", "Hot", "Sweltering", "Scorching"
        };

        private readonly ILogger<WeatherForecastController> _logger;

        public WeatherForecastController(ILogger<WeatherForecastController> logger)
        {
            _logger = logger;
        }

        [HttpGet]
        public IEnumerable<WeatherForecast> Get()
        {
            var rng = new Random();
            return Enumerable.Range(1, 5).Select(index => new WeatherForecast
            {
                Date = DateTime.Now.AddDays(index),
                TemperatureC = rng.Next(-20, 55),
                Summary = Summaries[rng.Next(Summaries.Length)]
            }).ToArray();
        }
    }
}
上述代码是在 Controller 里面直接演示了逻辑代码(包括数据查询),更多的情况,我们会把这些逻辑封装在 Service 中,并由 Controller 调用。如,创建 WeatherService.cs:
using System;
using System.Collections.Generic;
using System.Linq;

namespace WebApiSample
{
    public class WeatherService
    {
        private static readonly string[] Summaries = new[]
        {
            "Freezing", "Bracing", "Chilly", "Cool", "Mild", "Warm", "Balmy", "Hot", "Sweltering", "Scorching"
        };

        public IEnumerable<WeatherForecast> GetWeatherForecasts()
        {
            var rng = new Random();
            return Enumerable.Range(1, 5).Select(index => new WeatherForecast
            {
                Date = DateTime.Now.AddDays(index),
                TemperatureC = rng.Next(-20, 55),
                Summary = Summaries[rng.Next(Summaries.Length)]
            })
            .ToArray();
        }
    }
}
修改 WeatherForecastController.cs:
using Microsoft.AspNetCore.Mvc;
using System.Collections.Generic;

namespace WebApiSample.Controllers
{
    [ApiController]
    [Route("[controller]")]
    public class WeatherForecastController : ControllerBase
    {
        private readonly WeatherService _weatherService;

        public WeatherForecastController(WeatherService weatherService)
        {
            this._weatherService = weatherService;
        }

        [HttpGet]
        public IEnumerable<WeatherForecast> Get()
        {
            return _weatherService.GetWeatherForecasts();
        }
    }
}
注意:如果像上述代码 12 行中那样,使用构造函数注入 WeatherService,需要在 Startup.cs 中添加:
services.AddScoped<WeatherService>();
当我们在粒度越来越小的微服务、前后端分离的场景下进行开发和迭代,会发现 API 的数量会几何级数地上升。
此时为了能让 Service 中的逻辑方法毫无变化地传递给客户端,需要做大量 API 创建的重复劳动,维护也会越来越混乱。
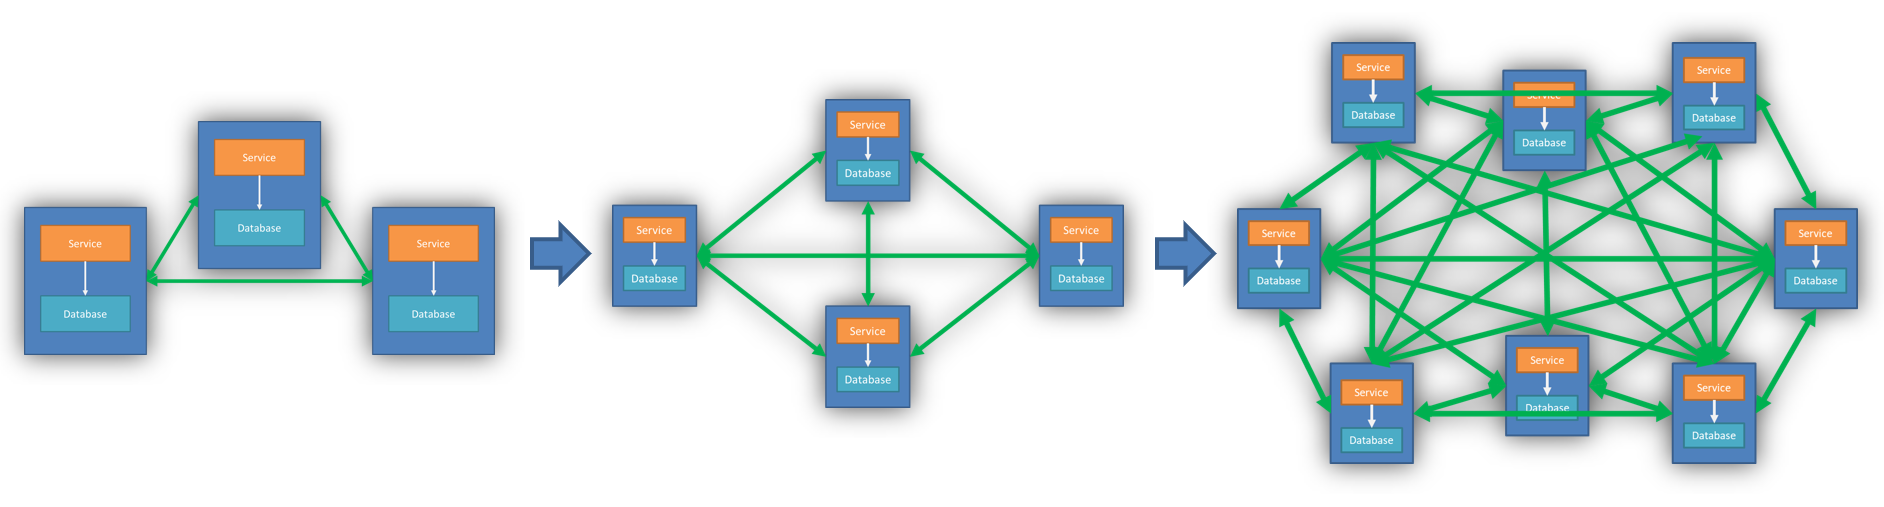
越来越复杂、混乱的 API 导致了大量低效、低价值的重复劳动
为了解决这样的问题,WebApiEngine 登场了! 让我们来看看 WebApiEngine 能做什么?
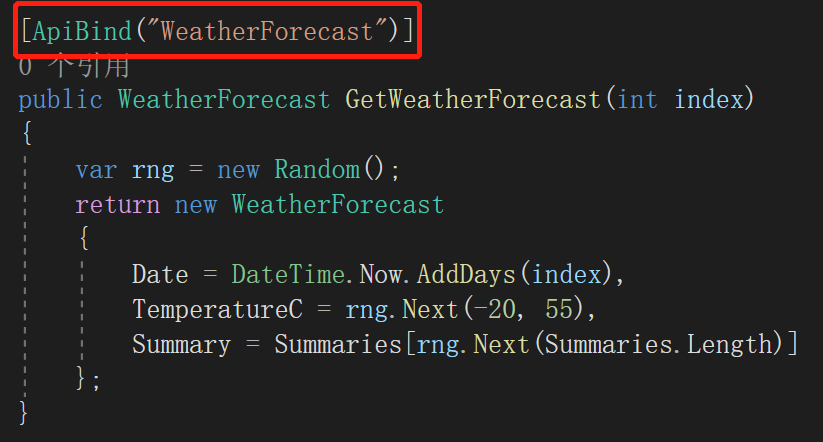
# 使用[ApiBind]标签让任何方法变成WebApi
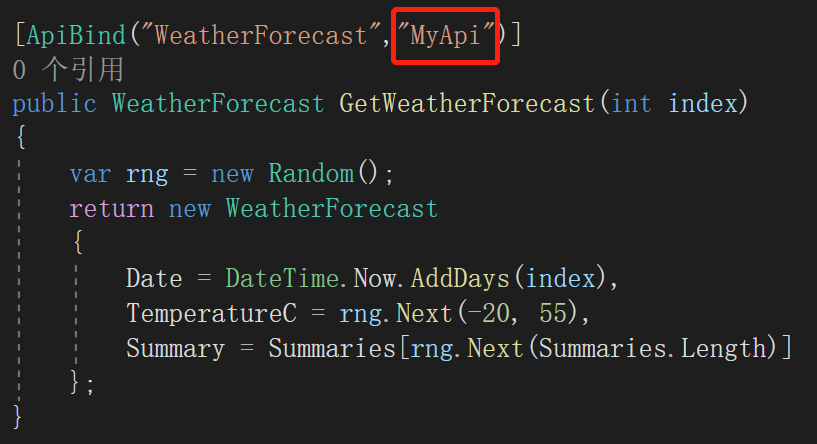
我们在 WeatherService 下再创建一个名为 GetWeatherForecast 的新方法,并附加一个 int 类型参数,用于演示新的接口:
public WeatherForecast GetWeatherForecast(int index)
{
    var rng = new Random();
    return new WeatherForecast
    {
        Date = DateTime.Now.AddDays(index),
        TemperatureC = rng.Next(-20, 55),
        Summary = Summaries[rng.Next(Summaries.Length)]
    };
}
然后,通过简单的 3 步,完成动态 API 的实现:
第一步:安装 Senparc.CO2NET.WebApi 包:

安装 Senparc.CO2NET.WebApi 包
也可以在项目目录下,使用命令行添加:
dotnet add package Senarc.CO2NET.WebApi
第二步:在 ConfigureServices() 方法中添加两行代码:
var builder = services.AddMvcCore().AddApiExplorer();
services.AddAndInitDynamicApi(builder, null);
第三步:添加 [ApiBind] 标签
在任意方法上添加 [ApiBind] 标签,如之前创建的 GetWeatherForecast(int index) 方法:
[ApiBind]
public WeatherForecast GetWeatherForecast(int index)
{
    var rng = new Random();
    return new WeatherForecast
    {
        Date = DateTime.Now.AddDays(index),
        TemperatureC = rng.Next(-20, 55),
        Summary = Summaries[rng.Next(Summaries.Length)]
    };
}
完成!
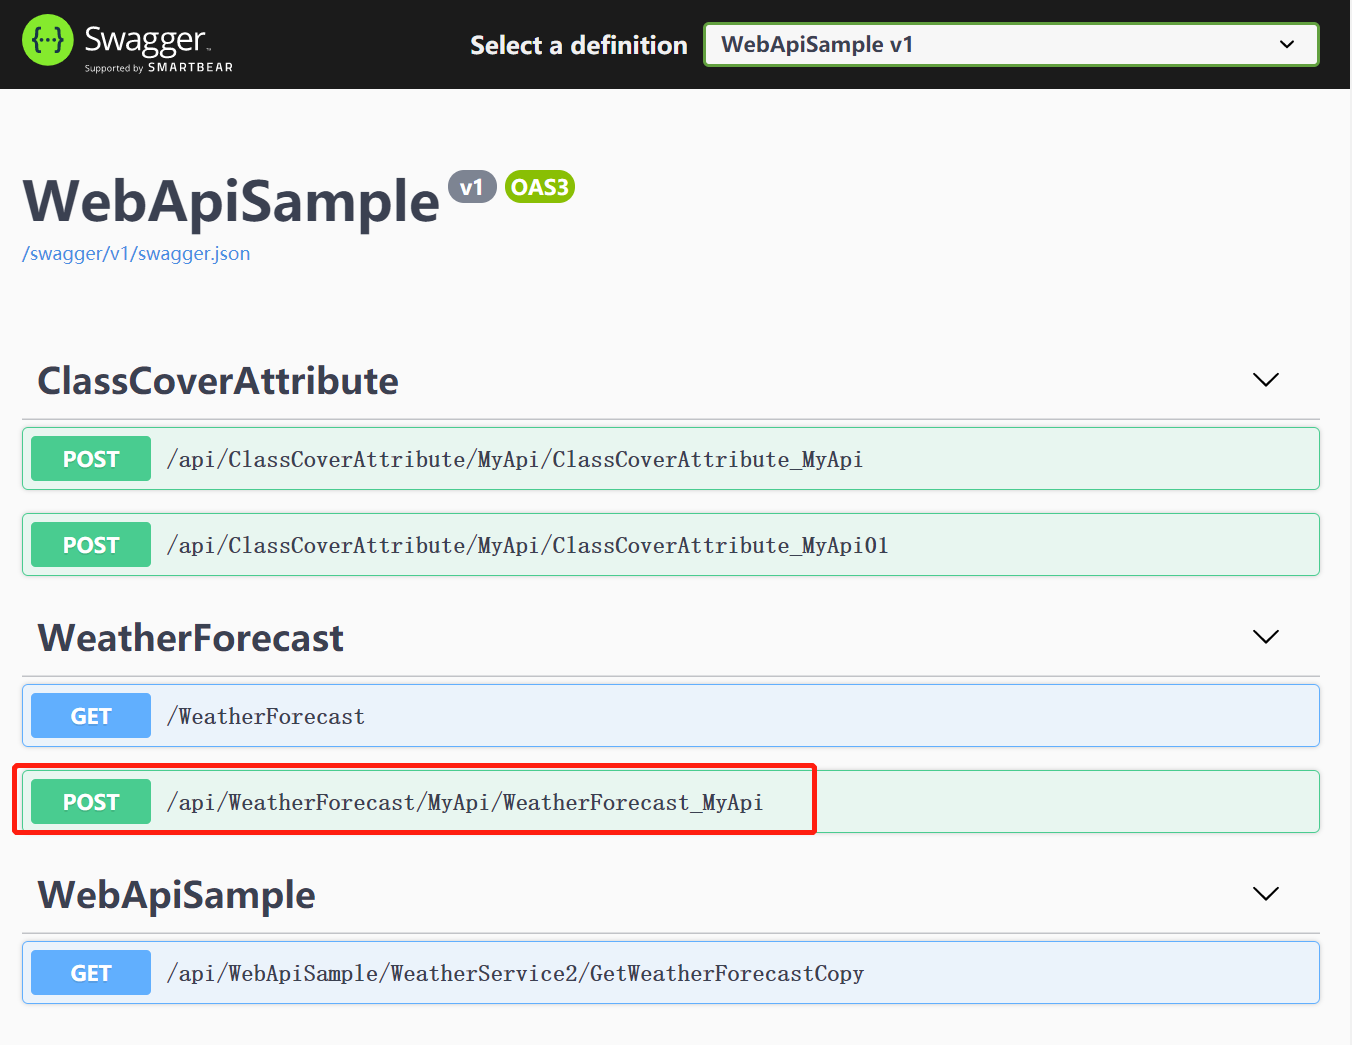
重新启动项目,即可看到新的 GetWeatherForecast 接口:
| Swagger 首页,显示新接口 | 测试执行 |
|---|---|
 |  |
上述我们只添加了 3 行代码(如果项目本身就需要 services.AddMvcCore(),则只需要 2 行),我们便完成了让任何一个方法开放为接口的能力!
小贴士:
1、您可以试一下静态方法,同样有效!
2、细心的开发者已经发现,自动生成的默认请求动作为 Post,我们可以通过修改全局配置修改默认动作,如:
services.AddAndInitDynamicApi(builder, null, ApiRequestMethod.Get);
# 对Api进行分类
有时候,为了方便 API 的管理,我们会对 API 的路径进行分类,甚至在模块化、插件化的框架下,同一个功能模块可能会由不同的程序集(或 dll)来支持,这时候怎么让不同“产地”的 API 进行充分“重组”呢?
我们只需要对 API 进行分类(Category)参数的设置,例如,在上述 ApiBind 特性中添加参数:
| 特性标签添加 Category 参数 | 成功合并到 WeatherForecast 分类 |
|---|---|
 |  |
# 自定义API名称
上述路径默认包含(暴露)了 GetWeatherForecast 方法所属的类,有时我们甚至需要将多个不同类下面的方法,整合到同一个路径前缀下,这种情况下,可以继续定义 ApiBind 的 Name 参数,使其拥有自定义的路径前缀:
| 特性标签设置 Name 参数 | 配置完全可控的路径前缀 |
|---|---|
 | 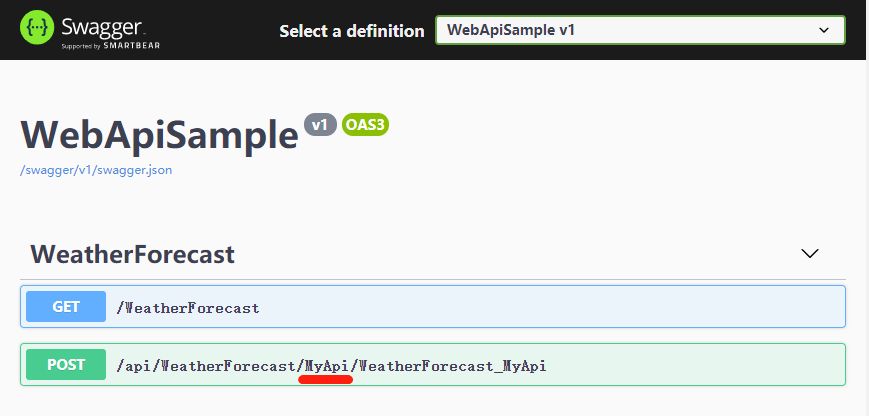 |
小贴士:
为了防止接口名称重合和便于直观定位,接口路径最后一段命名(WeatherForecast_MyApi)目前不可设置,规则为:<类名>_<方法名>。
当然如果真的出现重名,WebApiEngine 也会自动修改。
测试:我们添加一个新的类 WeatherService2,并且标记一个具有相同 Category 和 Name 值的方法:
public class WeatherService2
{
    [ApiBind("WeatherForecast", "MyApi")]
    public string GetWeatherForecast(string str)
    {
        return "the parameter value is :" + str;
    }
}
运行结果:

WebApiEngine 会自动处理重名的 API
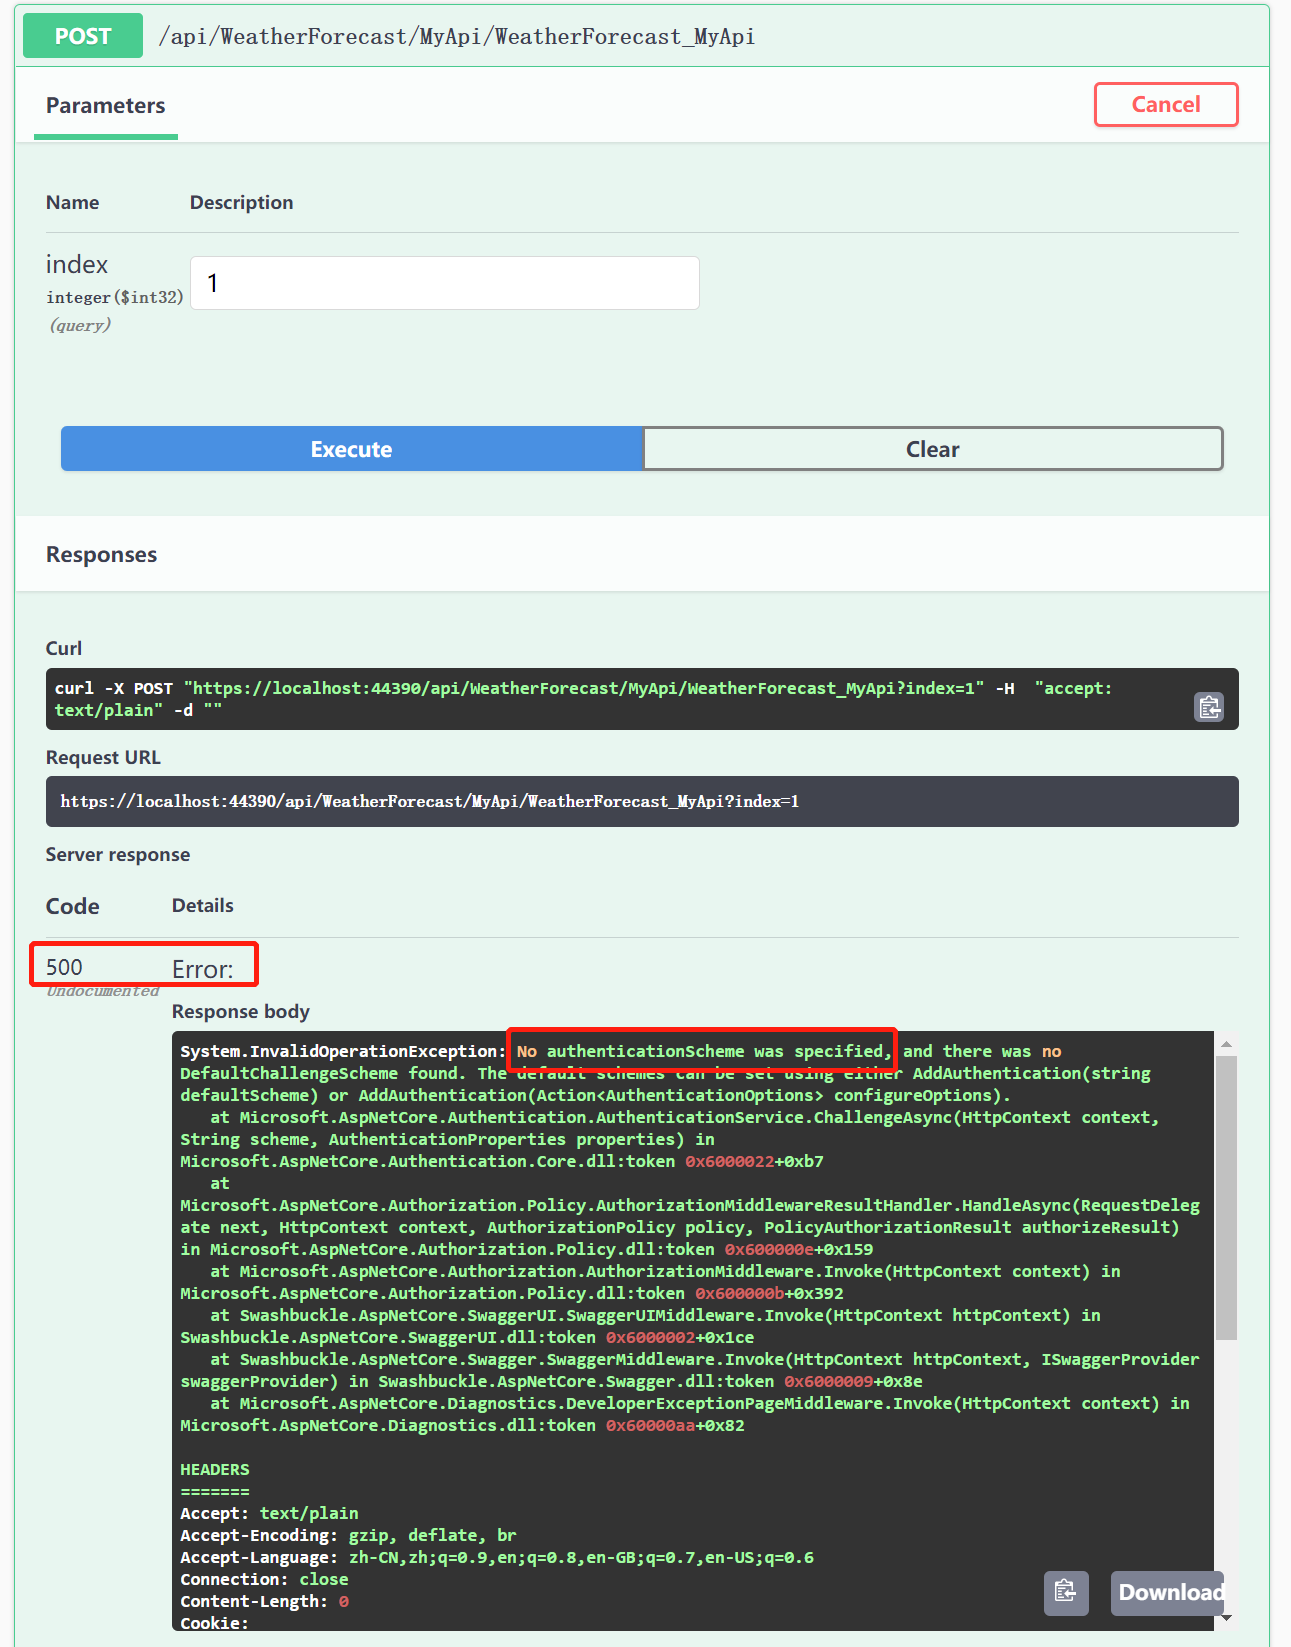
# 复制特性
动态 API 的另外一个难点是,正常的 WebAPI 通常都需要定义自己的特性,如访问鉴权、行为过滤,等等。WebApiEngine可以将原始方法上的特性标签直接复制到动态 API 上。
我们在 GetWeatherForecast 方法上添加权限验证特性:
[ApiBind("WeatherForecast", "MyApi")]
[Authorize]
public WeatherForecast GetWeatherForecast(int index)
{
    var rng = new Random();
    return new WeatherForecast
    {
        Date = DateTime.Now.AddDays(index),
        TemperatureC = rng.Next(-20, 55),
        Summary = Summaries[rng.Next(Summaries.Length)]
    };
}
然后运行接口:
# 为整个类配置WebApi
除了在某个具体的方法上添加 [ApiBind] 特性标签,您还可以在类(class)上使用此特性,使下属所有的方法(包括静态方法)都拥有相同的配置。
class 上的特性标签同样会自动配置,其规则如下:
1.如果 class 设置了特性标签(如 [Authorize]),则下属所有的方法也将继承对应特性;
2.如果下属方法具有和 class 一样的特性标签,将完全覆盖 class 的特性设置;
3.集成特性标签的顺序,为先按顺序添加 class 的标签,后按顺序添加方法的标签(注此顺序为 CustomAttributeData.GetCustomAttributes() 获得到的顺序);
测试:
将之前的 WeatherService2 类进行重写:
[ApiBind("ClassCoverAttribute", "MyApi")]
public class WeatherService2
{
    public string GetWeatherForecast(string str)
    {
        return "the parameter value is :" + str;
    }

    [ApiBind(ApiRequestMethod = ApiRequestMethod.Get)]
    public string GetWeatherForecastCopy(string str)
    {
        return "the parameter value is :" + str;
    }

    public static string GetWeatherForecastCopyStatic(string str)
    {
        return "[static method]the parameter value is :" + str;
    }
}
第 1 行代码在 class 上进行添加,使其中 2 个方法都生效。
第 9 行代码改写了 ApiBind 标签,使默认的 Post 方法,改为了 Get 方法。
第 10 行代码是一个静态方法,同样能“享受”整个 class 的配置(当然也支持使用自定义 [ApiBind],然后覆盖 class 的配置)。
运行结果:
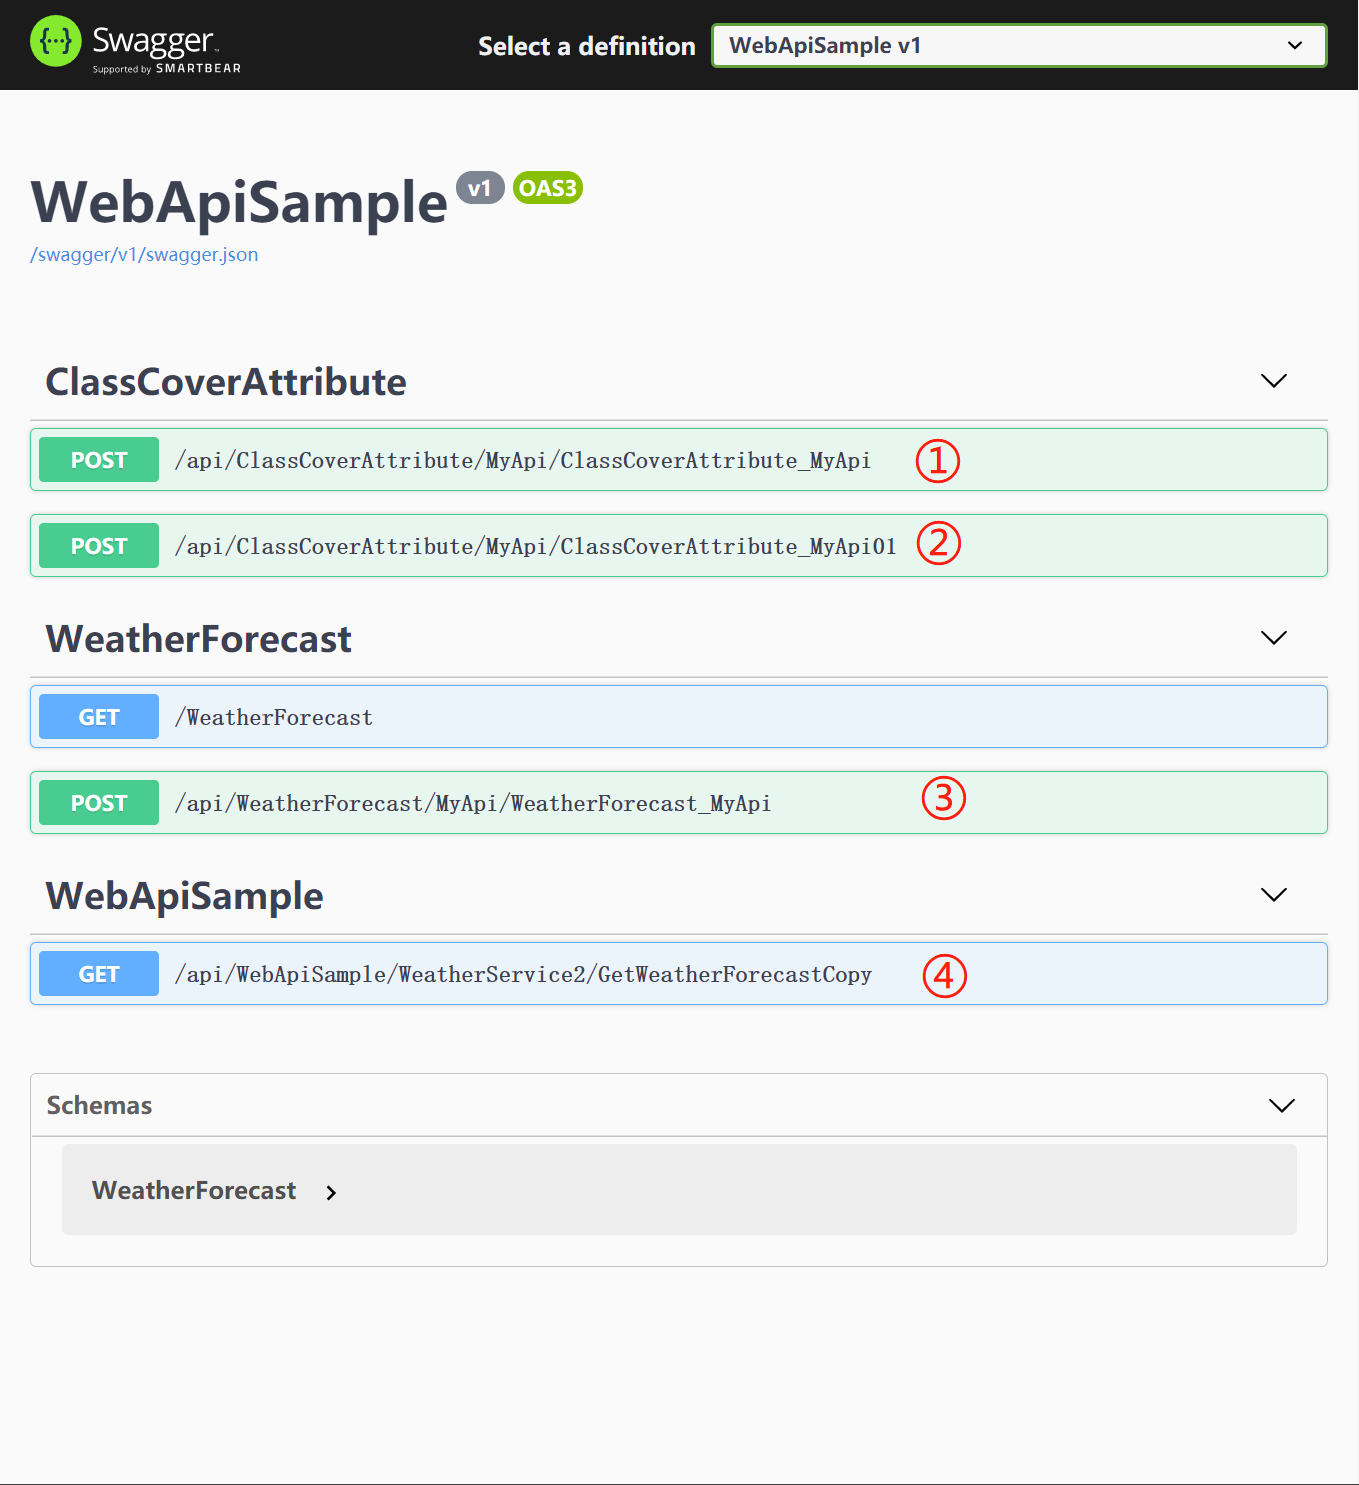
运行结果中:
① 是 GetWeatherForecast() 方法
② 是 GetWeatherForecastCopyStatic() 静态方法(因为使用了 class继承,因此默认为相同的名称,后续版本将升级为当前方法名称)
③ 是 WeatherService 类中的演示方法,和当前类无关
④ 是 GetWeatherForecastCopy() 方法,该方法的 [ApiBind] 特性覆盖了 class 上的特性,因此没有指定 Category,使用了默认的分类名称,即当前程序集名称
# 忽略某些特定的方法
有时,虽然我们偷懒将某个 class 一次性标记为 [ApiBind],但也会有个别的方法,我们并不希望开放为 API,这时候,可以使用 WebApiEngine 提供的忽略方法。
有两种方式可以做到。
方式一:使用 IgnoreApiBind 特性,如:
[IgnoreApiBind]
public static string GetWeatherForecastCopyStatic(string str)
{
    return "[static method]the parameter value is :" + str;
}
方式二:设置 ApiBind 特性中的 Ignore 属性,如:
[ApiBind(Ignore = true)]
public static string GetWeatherForecastCopyStatic(string str)
{
    return "[static method]the parameter value is :" + str;
}
# 忽略某些特定的分类
通过配置,我们也可以忽略部分特定的分类(Category),在运行引擎之前,在 startup.cs 中进行定义:
Senparc.CO2NET.WebApi.Register.AddOmitCategory("WeatherForecast");

var builder = services.AddMvcCore().AddApiExplorer();
services.AddAndInitDynamicApi(builder, null);
只需添加上述第 1 行代码,即可忽略整个 WeatherForecast 分类的接口(当然不能忽略通过原始方法编写的 Controller 内的 API):
| 忽略前 | 忽略后 |
|---|---|
 | 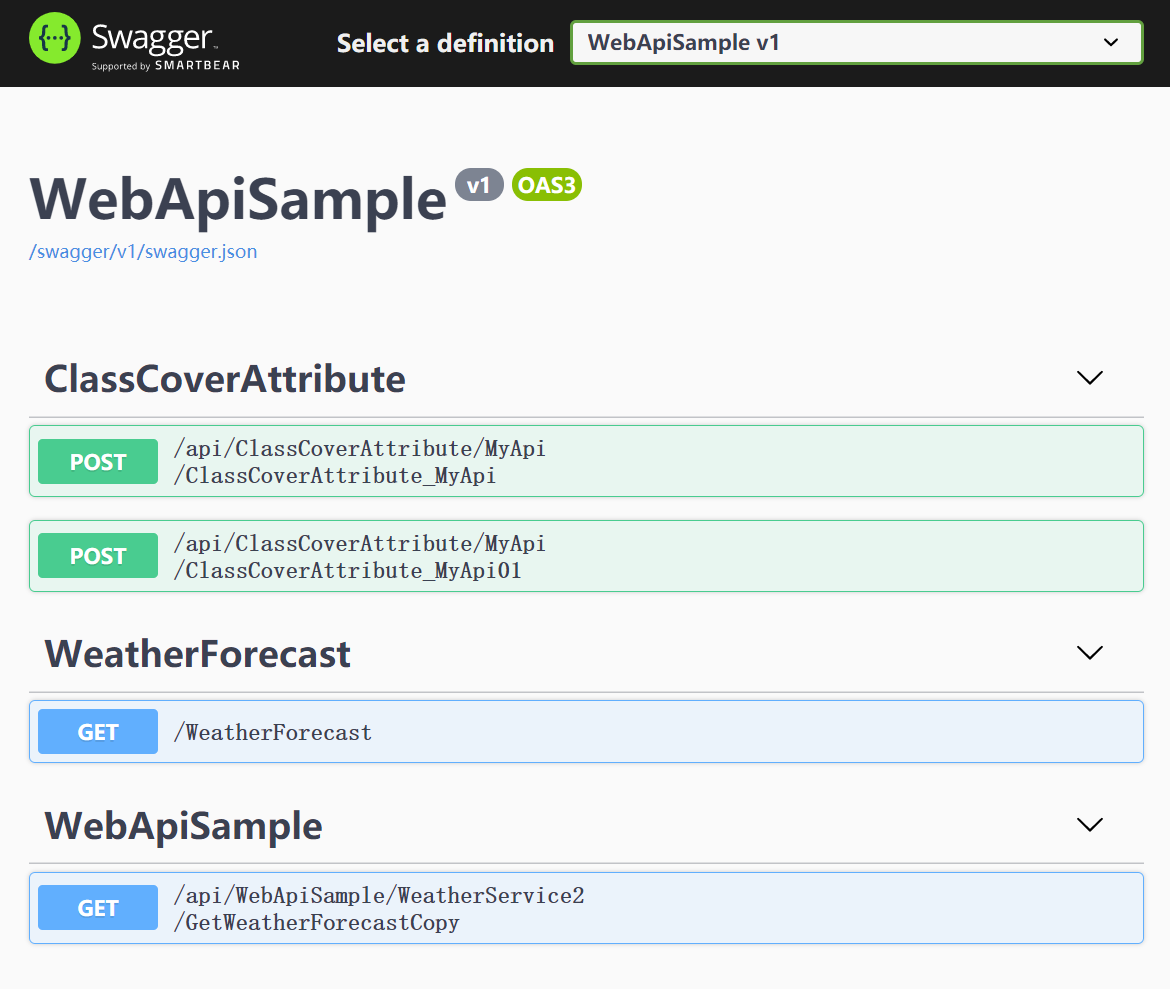 |
# 本文示例源码下载
https://github.com/JeffreySu/WebApiEngineSample (opens new window)